Plumbing - Made a Flared Connection
Making a flared connection is a common method for joining soft metal pipes, such as copper, aluminum, or brass. Here's a step-by-step guide to creating a flared connection:

Tools and Materials:
Pipe cutter
Flaring tool kit
Deburring tool
Fitting nut
Pipe
Steps:
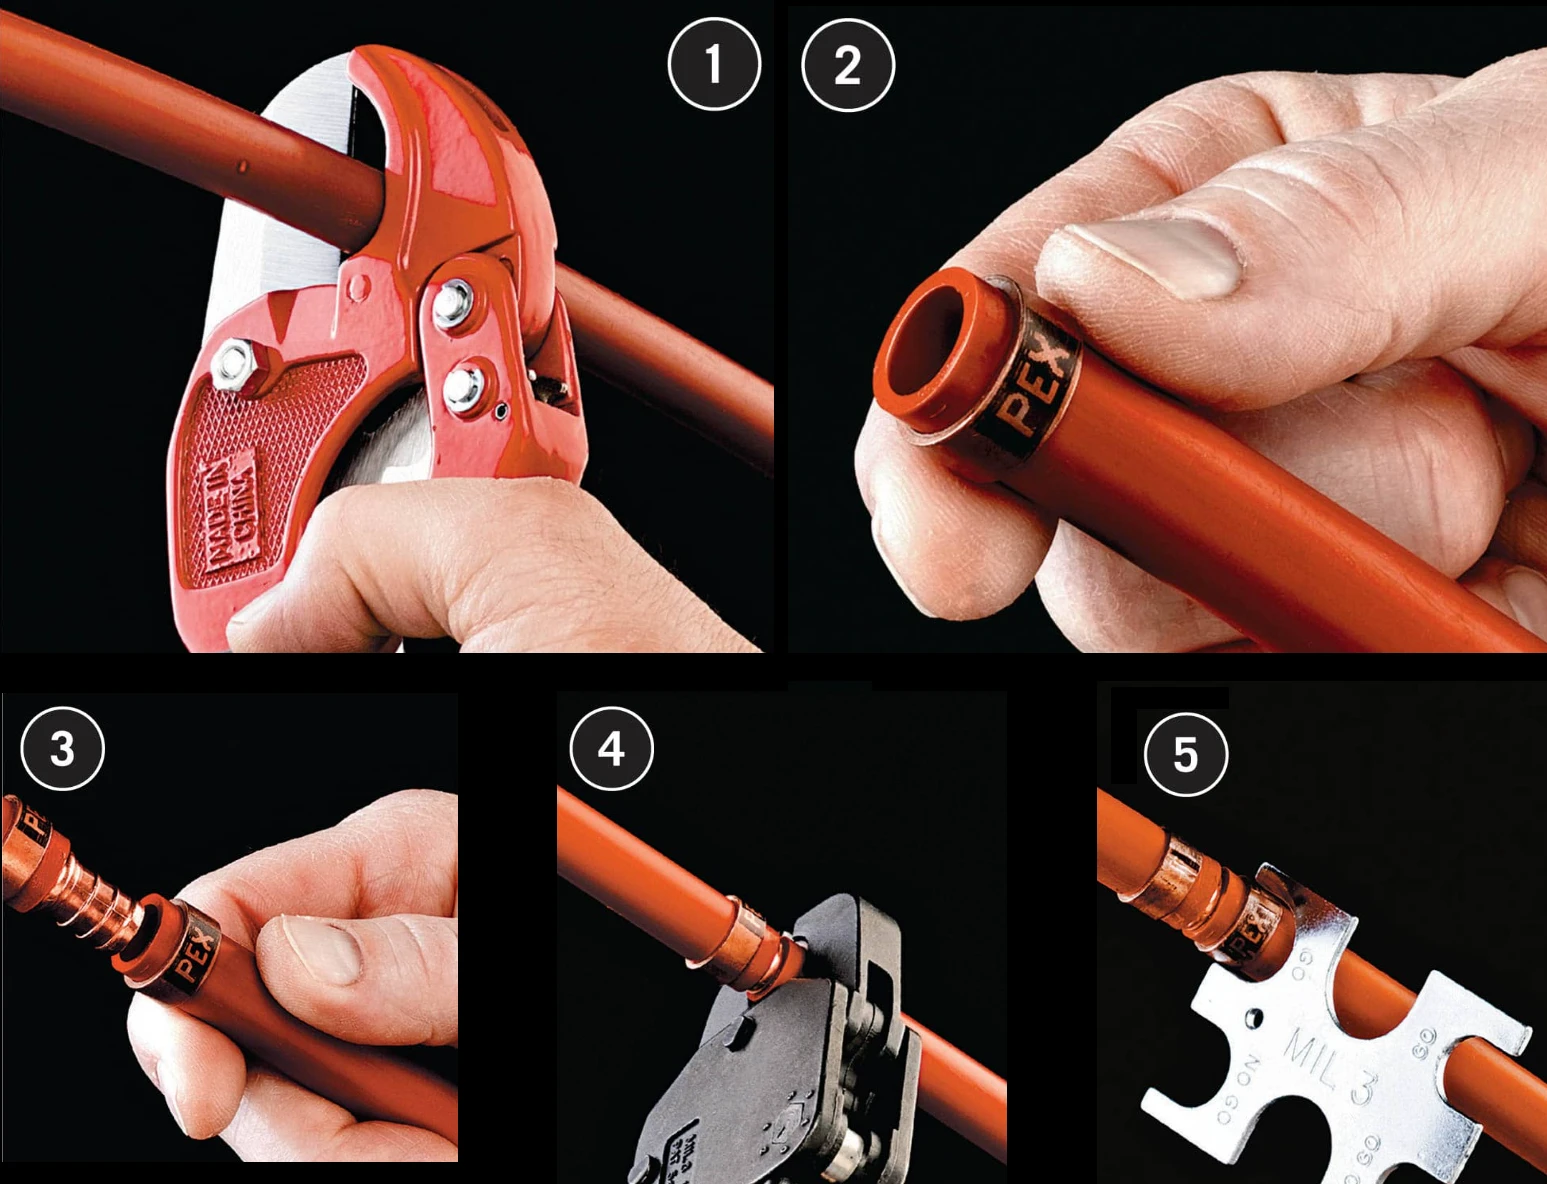
Cut the Pipe: Use a pipe cutter to cut the pipe to the desired length. Ensure the cut is straight and clean.
Deburr the Edges: Use a deburring tool or a utility knife to remove any burrs or rough edges from the cut end of the pipe.
Slide the Fitting Nut: Slide the fitting nut onto the pipe, threading it so that the threaded end faces the cut end of the pipe.
Clamp the Pipe: Place the pipe into the flaring tool's clamp, ensuring that the cut end extends slightly beyond the clamp's surface (typically about 1/8 inch). Tighten the clamp securely.
Align the Flare Cone: Position the flare cone of the flaring tool over the pipe. The flare cone should be centered over the pipe's end.
Create the Flare: Tighten the flaring tool's screw to press the flare cone into the pipe's end, creating a flared shape. Rotate the screw until the flare is complete. The flare should be smooth and evenly shaped.
Check the Flare: Inspect the flare to ensure it is uniform and free of cracks or splits. The flared end should form a 45-degree angle.
Assemble the Connection: Thread the fitting nut onto the corresponding fitting and tighten it to secure the flared connection. Ensure the flare seats properly against the fitting.
A flared connection provides a strong and leak-proof joint, especially for high-pressure applications.

Cut and deburr Slip the end into the proper flaring tool opening with about 3/32" of tubing projecting above the face of the tool. Tighten the wing nuts on the tool.
With the tool's wing nuts tightened,Slide the flaring yoke onto the body of the tool
Line the point of the flaring tool head over the end of the tubing .Slowly and steadliy screw down the head.Stop once the end is flared out to the edges of the hole.Remove the flaring tool and check that the pipe end seat securely inside the flare nut.
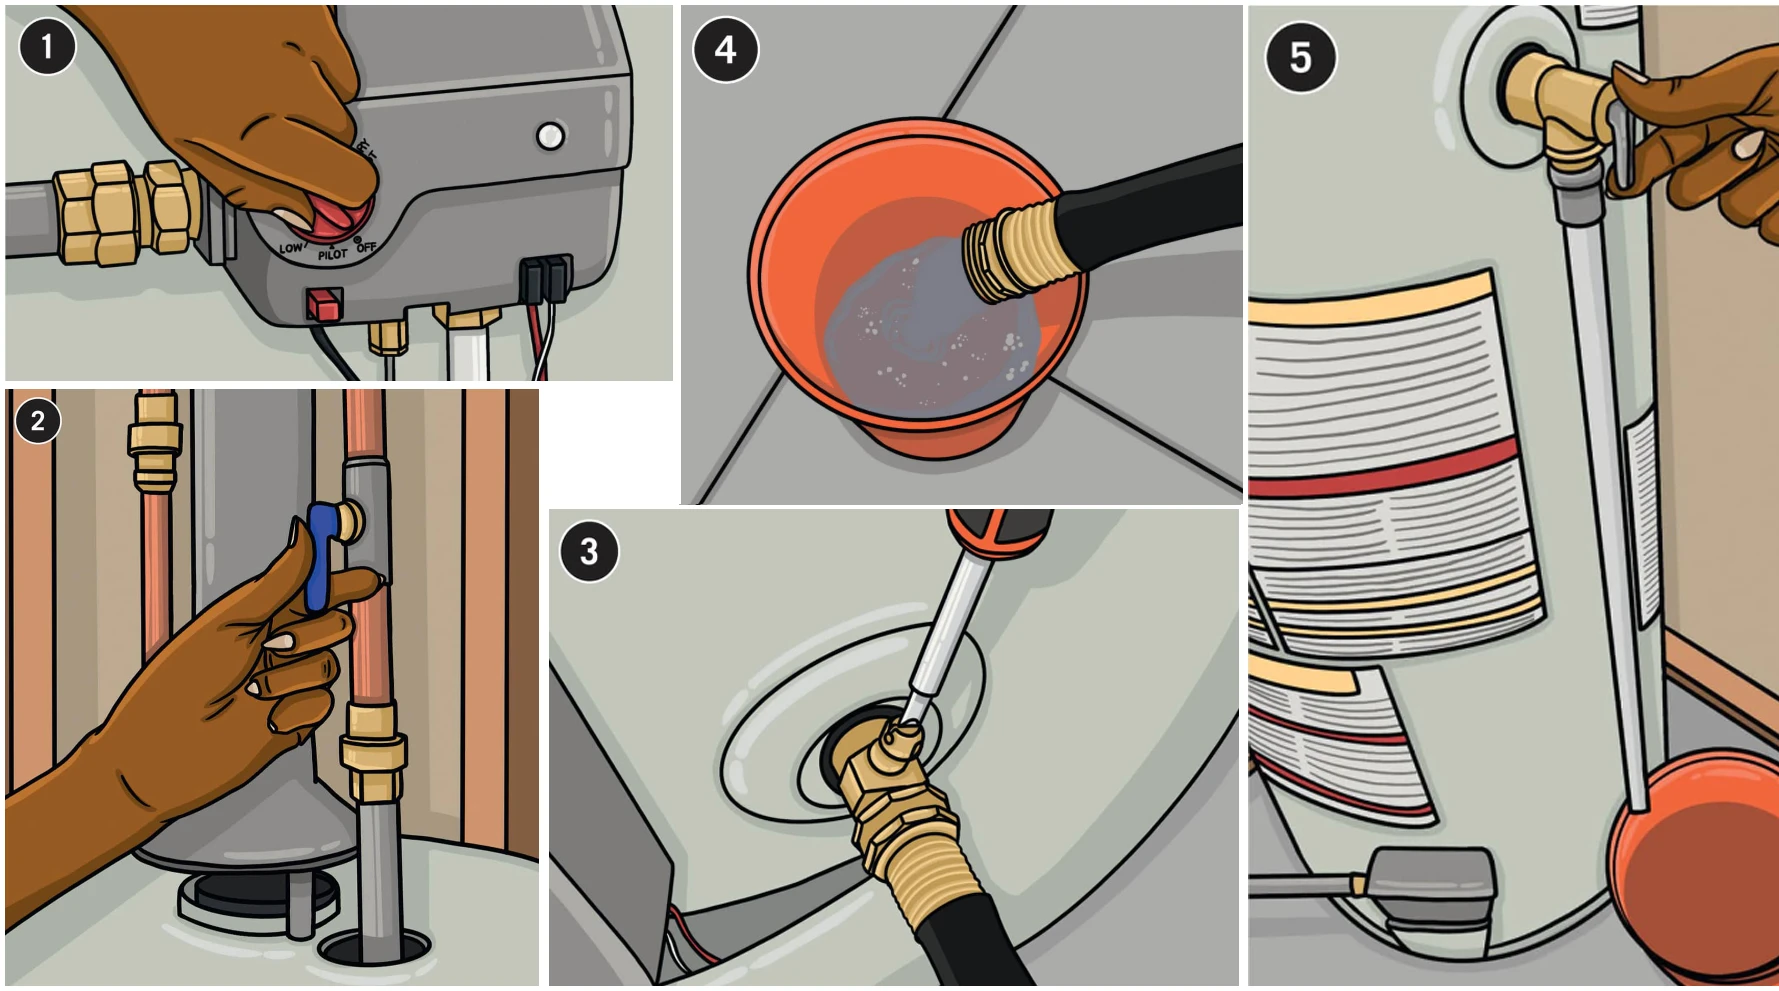
Tighten the flare fitting onto the flared end. Use two crescent or combination wrenches.(Note: For an extra layer of protecion against leaks ,brush pipe joint compound onto the fitting threads before fastening it to the flare nut.)
Coat the threads on the opposite end of the fitting with pipe joint compound. Screw the fitting into the supply line fitting(The process is the same for refrigerant ,gas ,or pressuriezed water lines) .Use a wrench to tighten the flare fitting into the pipe fitting.
Turn on the gas or refrigerant and check the fitting connections for leaks.Spary bottle leak detecor around the connections and check for bubbles .If you find a leak, tighten the connection.