Plumbing - Remove and install a new water heater
Got it! If you're planning to remove your old water heater, here are some general steps to follow:
Remove an Old Water Heater
Turn Off the Power and Water Supply:
For electric heaters, turn off the power at the breaker box.
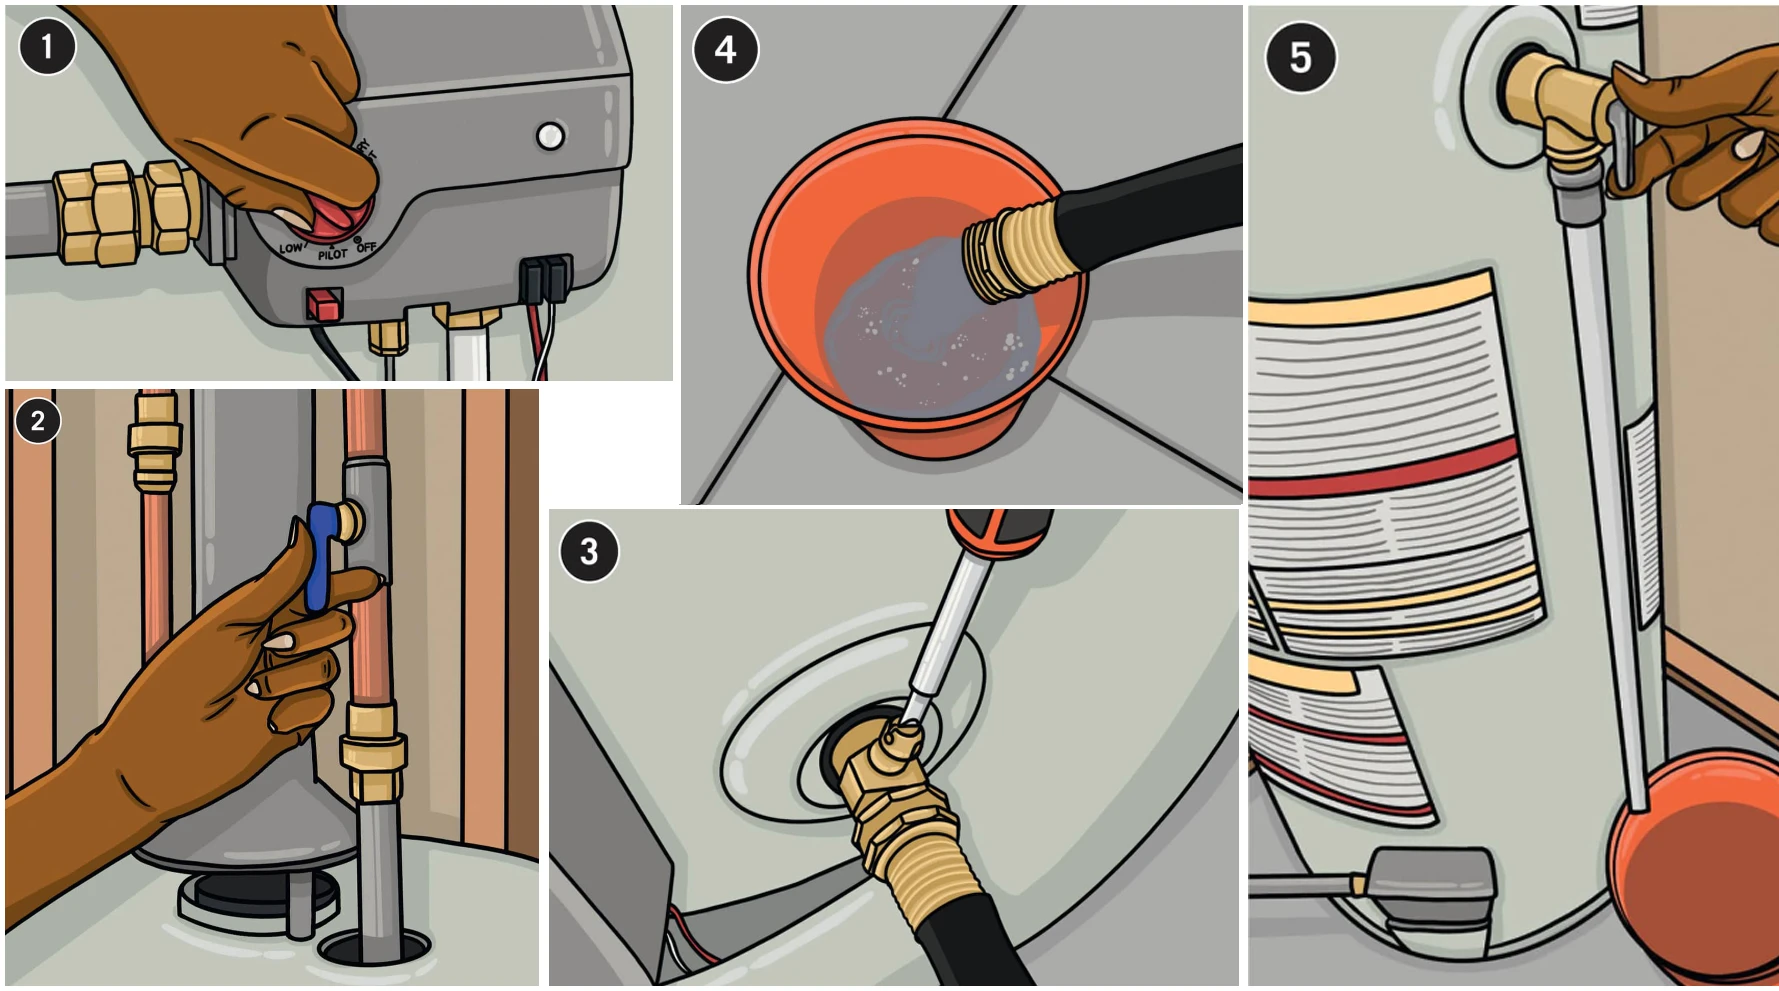
For gas heaters, set the gas control valve to "pilot."
Shut off the cold water supply valve above the heater.
Drain the Tank:
Connect a garden hose to the drain valve at the bottom of the tank.
Open the valve and let the water drain into a floor drain or outside.
Open a hot water tap nearby to help with draining.
Disconnect the Water Lines:
Use a pipe wrench to disconnect the cold and hot water lines.
Be prepared for some remaining water to leak out.
Disconnect the Power or Gas Line:
For electric heaters, remove the access panel and disconnect the wiring.
For gas heaters, disconnect the gas line with a wrench.
Remove the Water Heater:
Carefully move the heater out of its location. Water heaters can be heavy, so you might need assistance.
Safety Tips
Safety First: Always prioritize safety. If you're not comfortable with any of these steps, it's best to consult a professional.
Turn Off the Power/Gas: Make sure all power and gas lines are securely off to avoid accidents.
Proper Disposal: Check with your local regulations on how to properly dispose of the old heater.

The diagram (4) Unscrew the vent pipe form the draft hood. Also remove vent pipes up to and includig the elbow to inspect them for corrosion, and replace if needed.
(5) Cut the water supply lines. Prior to cutting shut off the cold water supply either at the stop valve downline form the heater or at the water meter. Replace the shutoff valve with a new ball type shutoff valve.
Installation a new water heater
Prepare the new water heater for installation .Before you put the water heater in place ,install a T+P (Temperature and Pressure valve) relief valve in the valve opening .Make sure to read the manufacturer's instructions and purchase the recommended valve type. Lubricate the threads and tighten the valve into the valve opening with a pipe wrench.

Here's a step-by-step guide to help you with installing a new water heater:
Steps to Install a New Water Heater
Prepare the Area:
Remove any debris or obstacles from the installation area.
Make sure the area is dry and well-ventilated.
Position the New Heater:
Place the new water heater in its designated location.
Ensure it is level and stable.
Connect the Water Supply:
Attach the cold water supply line to the inlet marked "cold."
Attach the hot water supply line to the outlet marked "hot."
Use pipe tape or joint compound on the threads to prevent leaks.
Tighten the connections with a wrench.
Connect the Pressure Relief Valve:
Install the pressure relief valve on the side or top of the heater (if not pre-installed).
Attach a discharge pipe to the valve and direct it to a safe drainage location.
Connect the Power or Gas Line:
For electric heaters, connect the wiring according to the manufacturer's instructions.
For gas heaters, connect the gas line and check for leaks using a soapy water solution.
Fill the Tank:
Open the cold water supply valve to fill the tank.
Open a nearby hot water tap to let air escape from the system.
Check for any leaks and tighten connections if necessary.
Turn On the Power or Gas:
For electric heaters, turn on the power at the breaker box.
For gas heaters, turn on the gas supply and light the pilot (if required).
Set the Temperature:
Adjust the thermostat to your desired temperature, typically around 120°F (49°C).
Safety Tips
Safety First: Always prioritize safety. If you're not comfortable with any of these steps, it's best to consult a professional.
Turn Off the Power/Gas: Make sure all power and gas lines are securely off to avoid accidents.
Proper Ventilation: Ensure proper ventilation for gas heaters to prevent carbon monoxide buildup.

Remove the old unit and position the new unit in the installation area. A drip pan is reqired if the water heater is installed where a leak could cause damage. This usually means anywhere expcet a crawlspace or an unfinished basement .if the water heater is not level,level it by shimming under the bottom with a metal or composite shim.
Attach a discharge tube to the T+P relief valve . You may use either copper pipe or CPVC drain pipe.Cut the tube so the free end is between 1-1/2" and 6" above the floor.If you have floorcoverings you wish to protect, and a 90degree elbow and a copper drain tube that leads from the discharge tube to a floor drain.
Attach the draft hood for the flue to the top of the unit with the provided hardware. Attach any other connector parts that are not preattached according to the manufacturer's instructions.
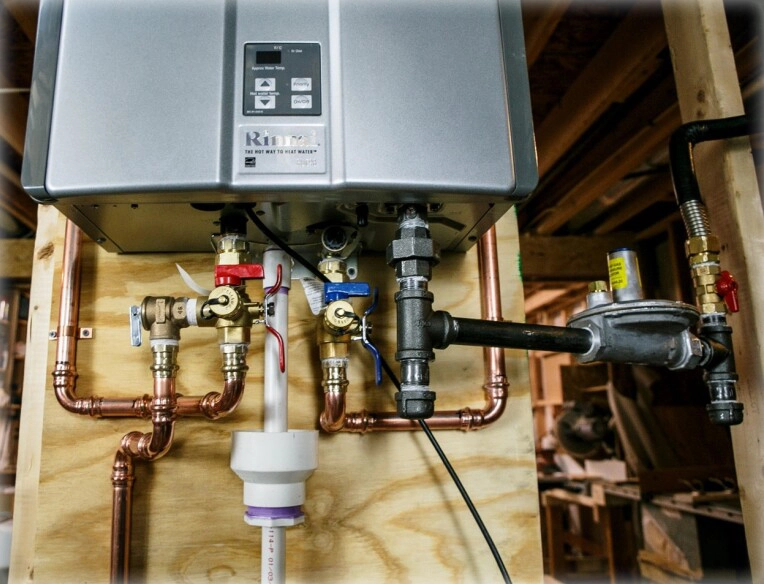
Attach approved supply connectors to the inlet and outlet ports at the top of the appliance. Flexible connectors are much easier to work with, but you may use copper tubing if you prefer. If using copper, you'll need a red-coded copper nipple for the outlet port and a blue-coded copper nipple for the inlet port (inset).
Join the supply connectors to the supply tubing with approved couplings. If the supply line feeding the water heater has no shutoff valve nearby, it is recommended that you add one. As long as there is a shutoff on the incoming supply side you do not need one on the outgoing (hot water) line.
Assemble the vent and attach the end to the draft hood for the flue.
OPTION: If you are running a new vent, you will most likely need to use an elbow fitting and adjustable fittings to achieve the configuration you need. The new vent should be inspected and approved by your local building department.
Begin making the gas connections. Working with gas pipes and tubing is dangerous, and you should only attempt it if you have considerable experience in this skill area. If you are not comfortable working with gas pipe, hire a plumber to take on this part of the job. Begin by screwing the male-threaded union securely into the gas regulator port. Wrap gas-approved.
Connect a flexible gas supply tube to the port on a shutoff valve on the gas supply line. The shutoff must be within six feet of the appliance. Connect the other end to the union at the regulator. Wrap the threads in each threaded connection with three or four tight courses of gas-rated lubricating tape first. Include a sediment trap in the hook-up (see here).
Turn on the gas supply and test the gas connections with testing solution (inset) to make sure there are no leaks do not use dish soap or any other products that may contain chlorides. Make sure the tank drain valve is closed, then turn on the water supply and check for water leaks. Once you have determined there are no plumbing leaks, light the pilot light (the instructions are always printed on a label near the pilot light).
Hook Up Electric water heater
The fuel supply connection is the only part of installing an electric water heater that differs from installing a gas heater, except that electric heaters do not require a vent. The branch circuit wires (240 volts) are twisted together with mating wires in the access panel located at the top of the unit.
Temperature adjustments on electric water heaters are made by tightening or loosening a thermostat adjustment screw located near the heating element. Always shut off power to the unit before making an adjustment. In this photo you can see how close the live terminals for the heating element are to the thermostat.